

Creating Groups
- Groups can be created by selecting from pre-populated common groups from the Type combo box or by selecting New Group, New Room Group, New Window Group option.
- Once the name is selected or input on the Name text box, Create button should be pressed which offers to select items to be added to the new group.
- Any item under a category which is ticked on the exclude list is ignored when selecting items to be added to the group.
- Some categories such as Plumbing and Furniture are always excluded from the groups by default.
- If those items need to be added to a group, they should be unticked from the exclude list temporarily.
- Room or Window group automatically filters only registered room/window when adding items.
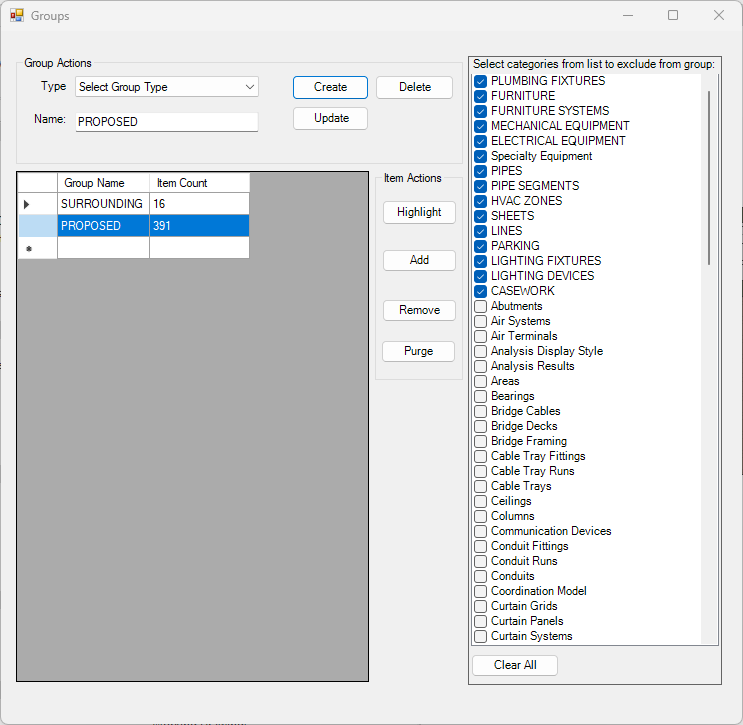
Updating Groups
- Remove items under certain category
- Tick the categories on the exclude list and then Select the Group name and then Update button.
- Any objects under the newly ticked exclude categories will be removed from the group.
- Remove items by selecting them
- In order to remove items, press Remove button and then select the items to be removed from the group.
- In order to remove items by selection, the category which a item belongs to must not be ticked on the exclude list.
- Add new items to the group
- To add items by selection: Press Add button and select elements from the model to be added to the group.
- In order to add items under a category: Untick the category on the exclude list first, and then press Add button to select elements.
(unticking a category from the filter list would not automatically add category elements to the group.)
FAQs
How to exclude objects from Revit Links?
- Revit Links are inserted as single object to the group so it is not possible to exclude objects when adding them to the group.
- Objects from all phases are included and is not possible to filter by phase.
- They are filtered at the conversion time based on the exclusion list.
- Tick the categories on the exclude list and then close the group dialogue. The list is saved on Project settings and will be used on conversion time.
How to exclude objects from Imported Autocad DWG instances?
- Autocad DWG Links are inserted as single object to the group so it is not possible to exclude objects when adding them to the group.
- However it is possible to exclude objects by layer from the import instance itself.
- Select the imported dwg instance and then Click Modify and the Delete Layers. Select the layers to exclude and Press Ok.
- Refer to Revit help topic “Delete Layers in CAD files” for step by step guide.
Which groups should the windows be on?
- Windows must be added to the group where they exist.
- Windows on Proposed buildings should be added to Proposed group.
- Windows on Surrounding building should be added to Surrounding group.
- Any windows on Existing buildings should be added to Existing group.
- If Windows are registered after the model is converted, the model must be converted again to make sure the calculation process includes the windows correctly.
- The results will be incorrect if the registered Windows are not added to the relevant groups.