
How to name the group?
- Groups must be named precisely. EXISTING, PROPOSED and SURROUNDING
- EXISTING: For buildings/structures which are to be demolished.
- PROPOSED: For buildings/structures which are to be added.
- SURROUNDING: For buildings/structures which stay the same.
What are the steps to convert the model?
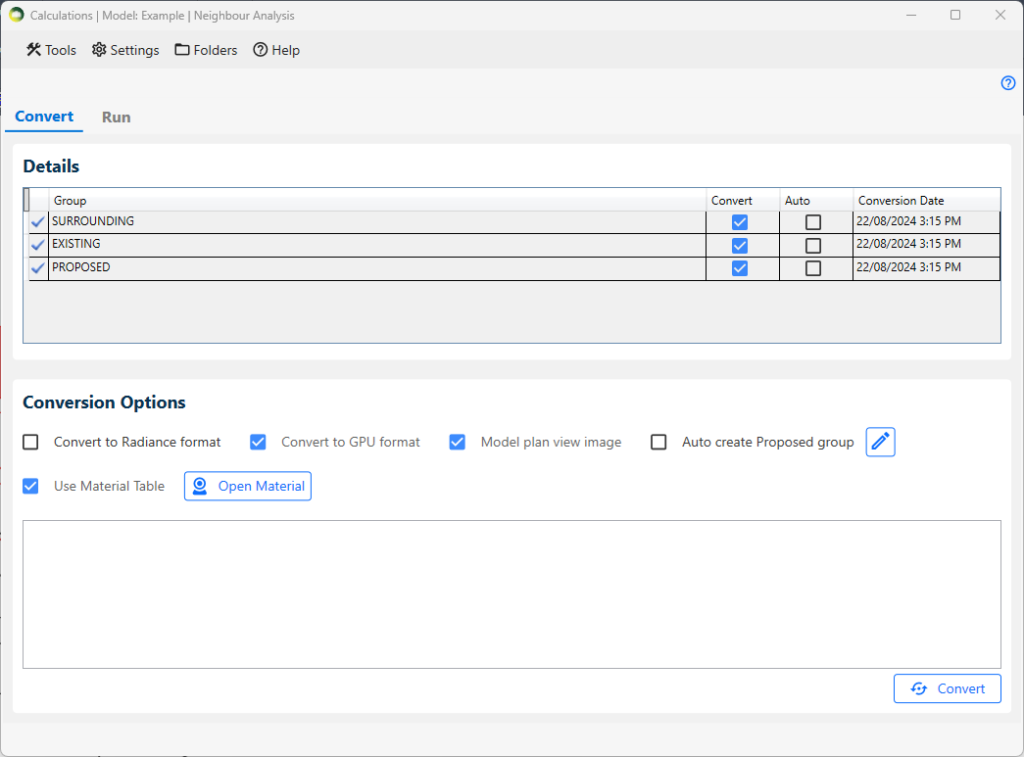
- In the Details section, select the convert checkbox next to the group in which you are interested.
- In the Conversion Options section:
- If you want to run calculations in GPU, tick on the Convert to GPU format option. It requires a compatible graphics card.
- If you want to run DF and Climate calculations in CPU, the Convert to Radiance format option must be ticked. ROL and BRE calculations on the CPU don’t require Radiance conversion.
- Tick the Use Material Table option to use a material table.
- To modify the material table, please click on Open Material button. For more details on the material settings, please refer to Material Knowledge Base.
- Click on the Convert button located at the right-bottom corner of the dialogue.
How to avoid re-converting a large surrounding every time?
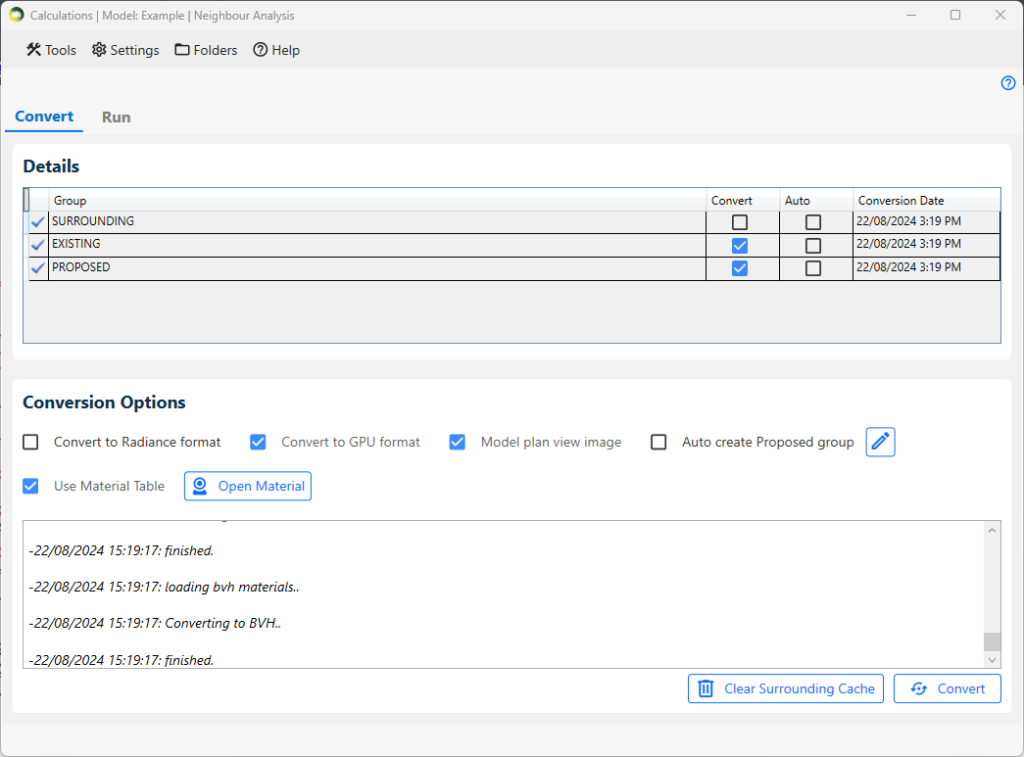
- The convert option for the Surrounding group must be unticked and the Existing and Proposed group should be ticked before conversion.
- A cache file will be created on the first conversion for surrounding and any subsequent conversion will re-use that.
- If the surrounding group changes, then the cache must be cleared with the Clear Surrounding Cache button and Convert again
Can registered windows be added to any groups?
- Registered windows should be in either the Proposed or Surrounding group based on where they are.
- The same window must not be added to both the Proposed and Surrounding group.
How to recreate proposed group from layers?
- Tick Auto create Proposed group option in Conversion Options section.
- The default layer for proposed group is 3D_PROPOSED_BUILDINGS.
- However, this can be modified and new layers can be added for proposed group. For this follow the following steps:
- Click on edit icon next to Auto create Proposed group option. Proposed Group Layers Setting dialogue will appear.
- Select the layer from the dropdown and click on Add button.
- If you want to delete the selected layer, click on the delete icon next the layer name.
- Next, click save.
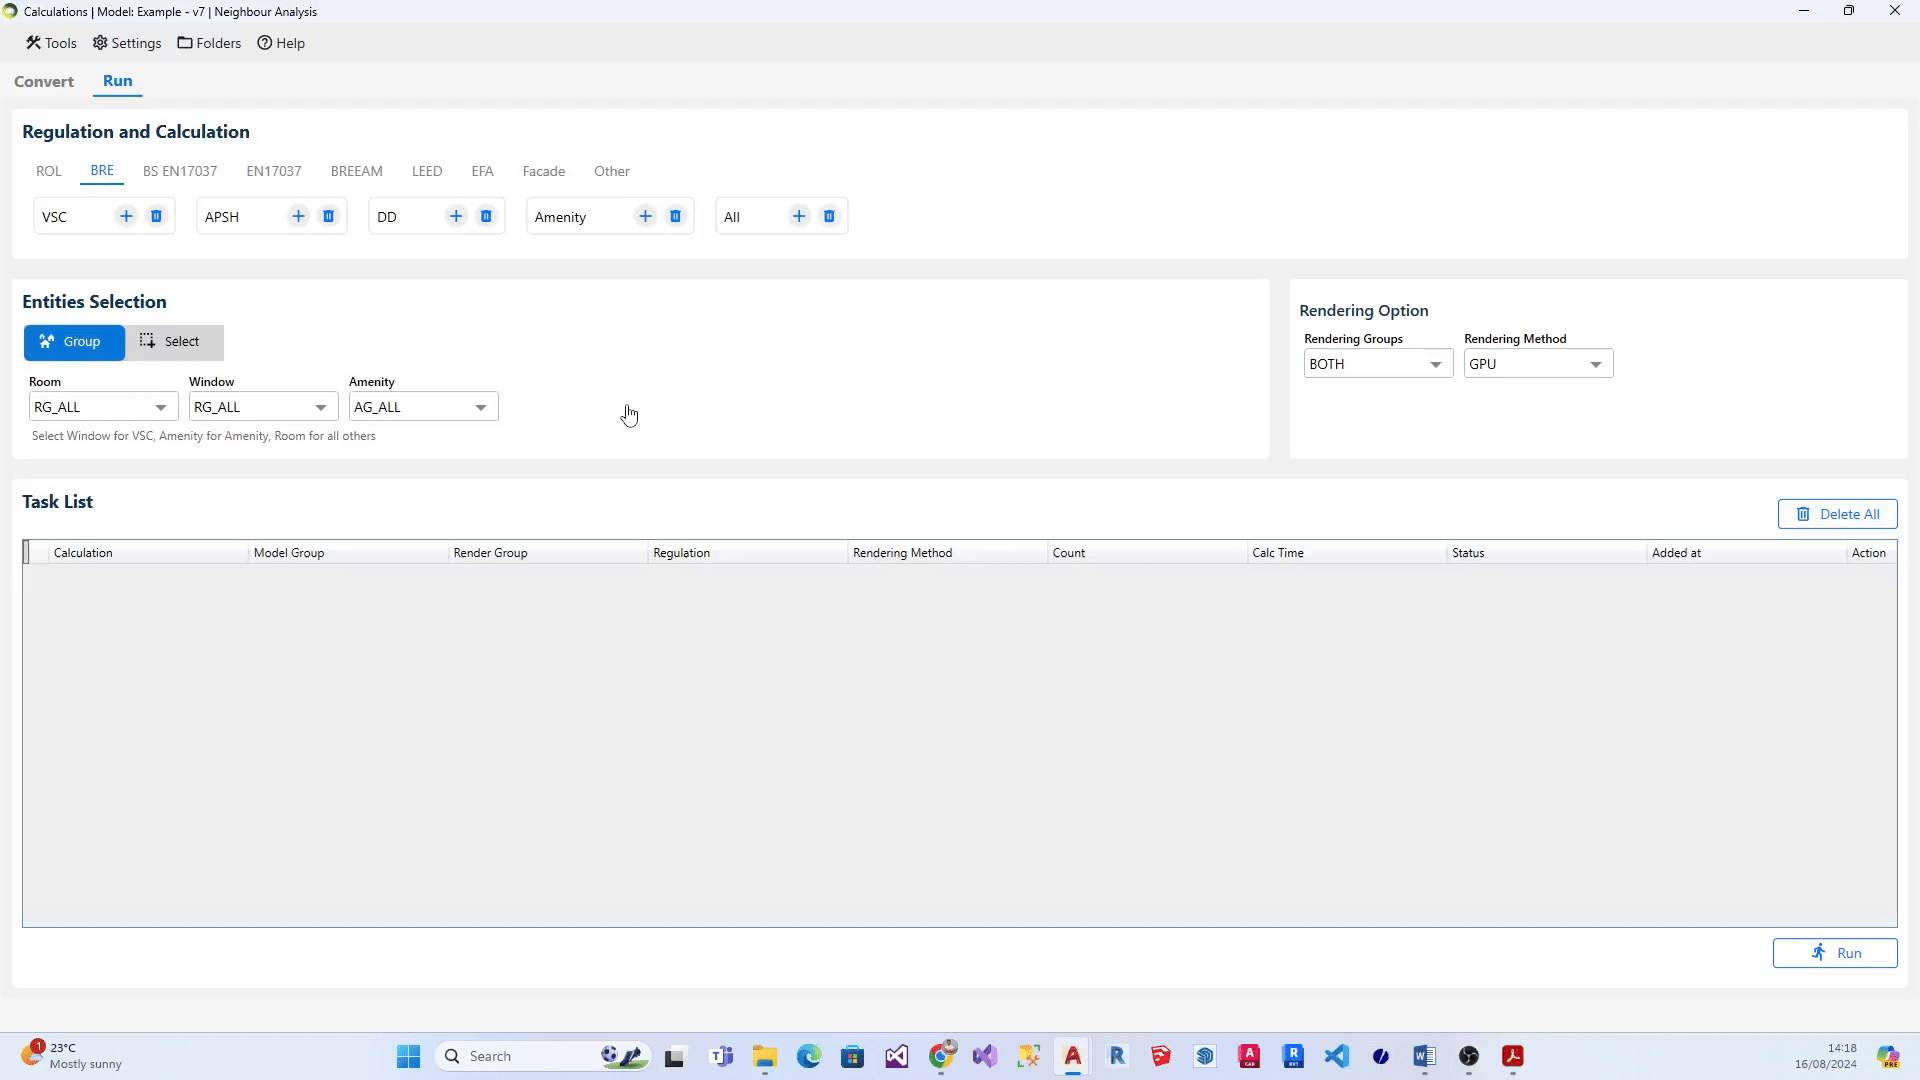
What are the steps to add calculations to the list?
- Select the relevant regulation (eg: ROL, BRE, BS EN17037). The associated calculations get displayed below each regulation.
- Set the Group on the relevant boxes.
- Click on the + icon next to the calculation name to add the individual calculation.
- Alternatively, Click on the + icon next to All to add all the calculations in the regulation.
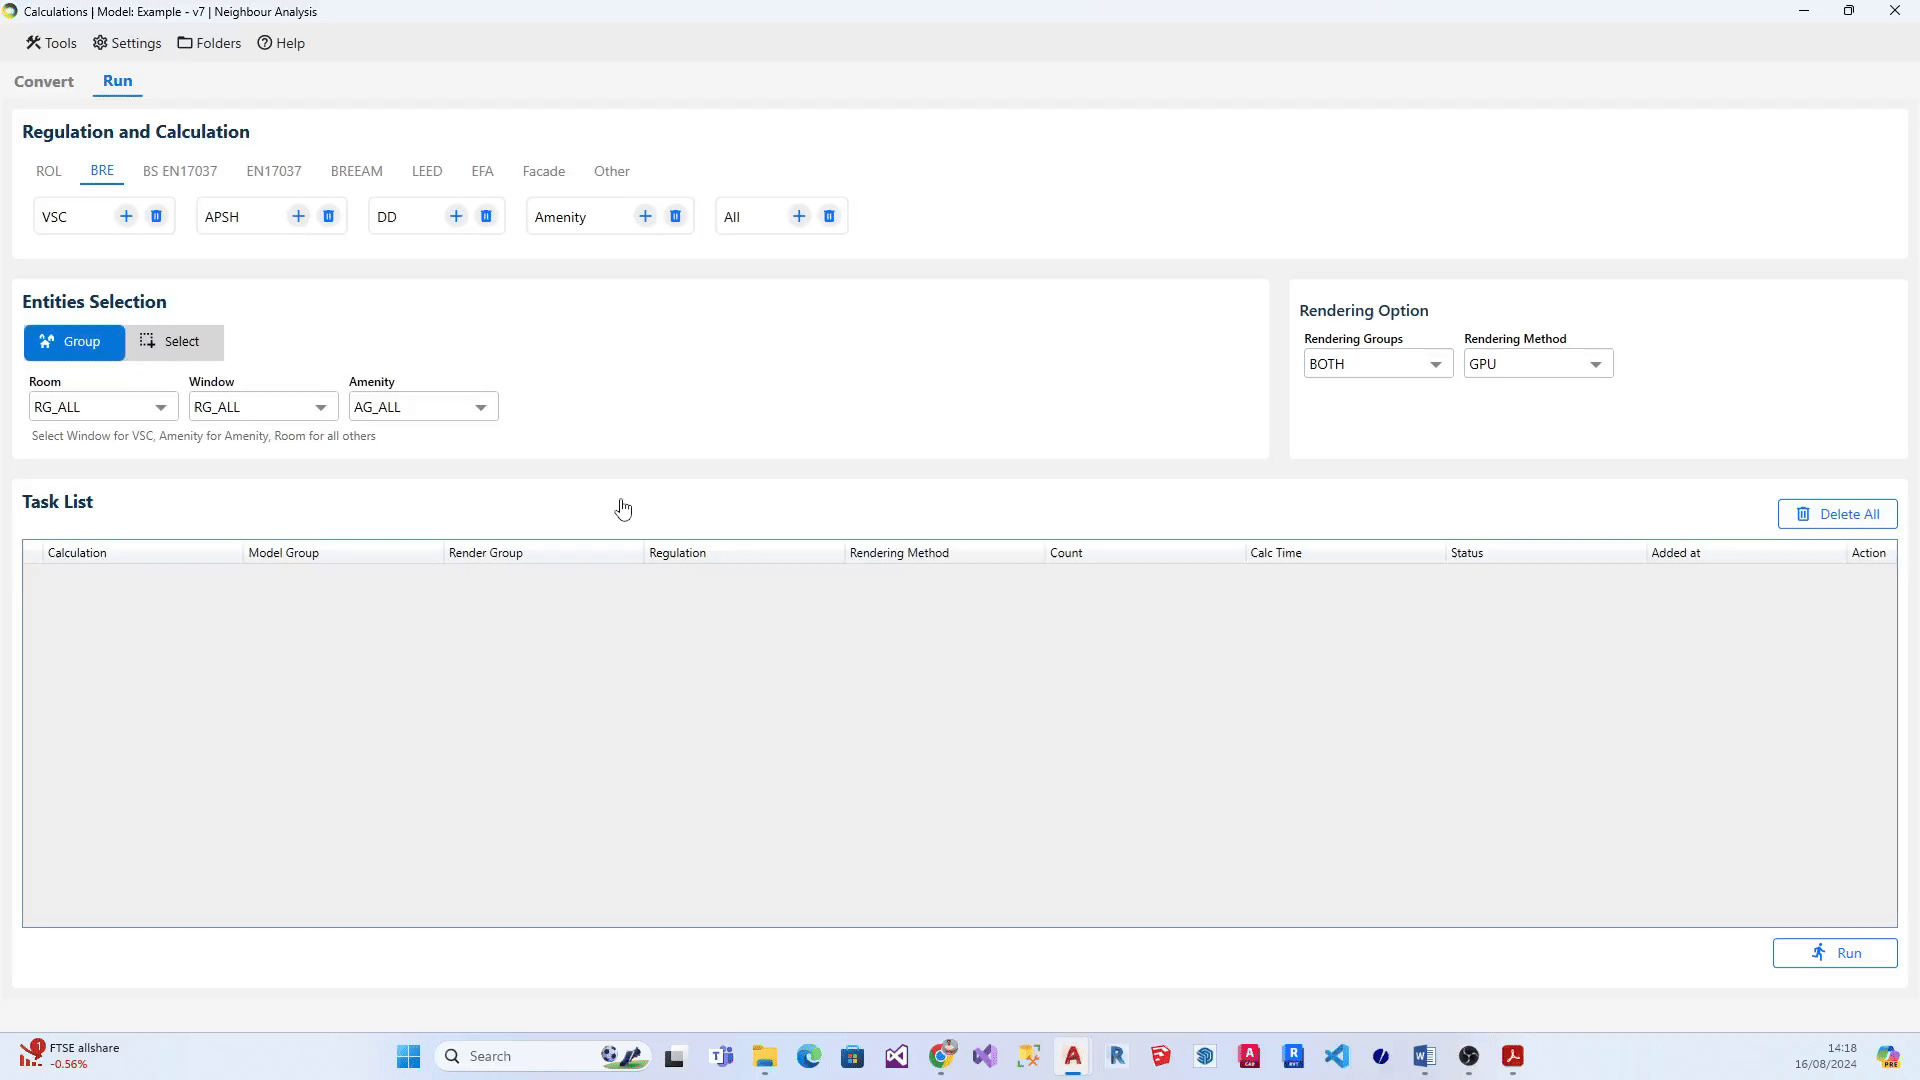
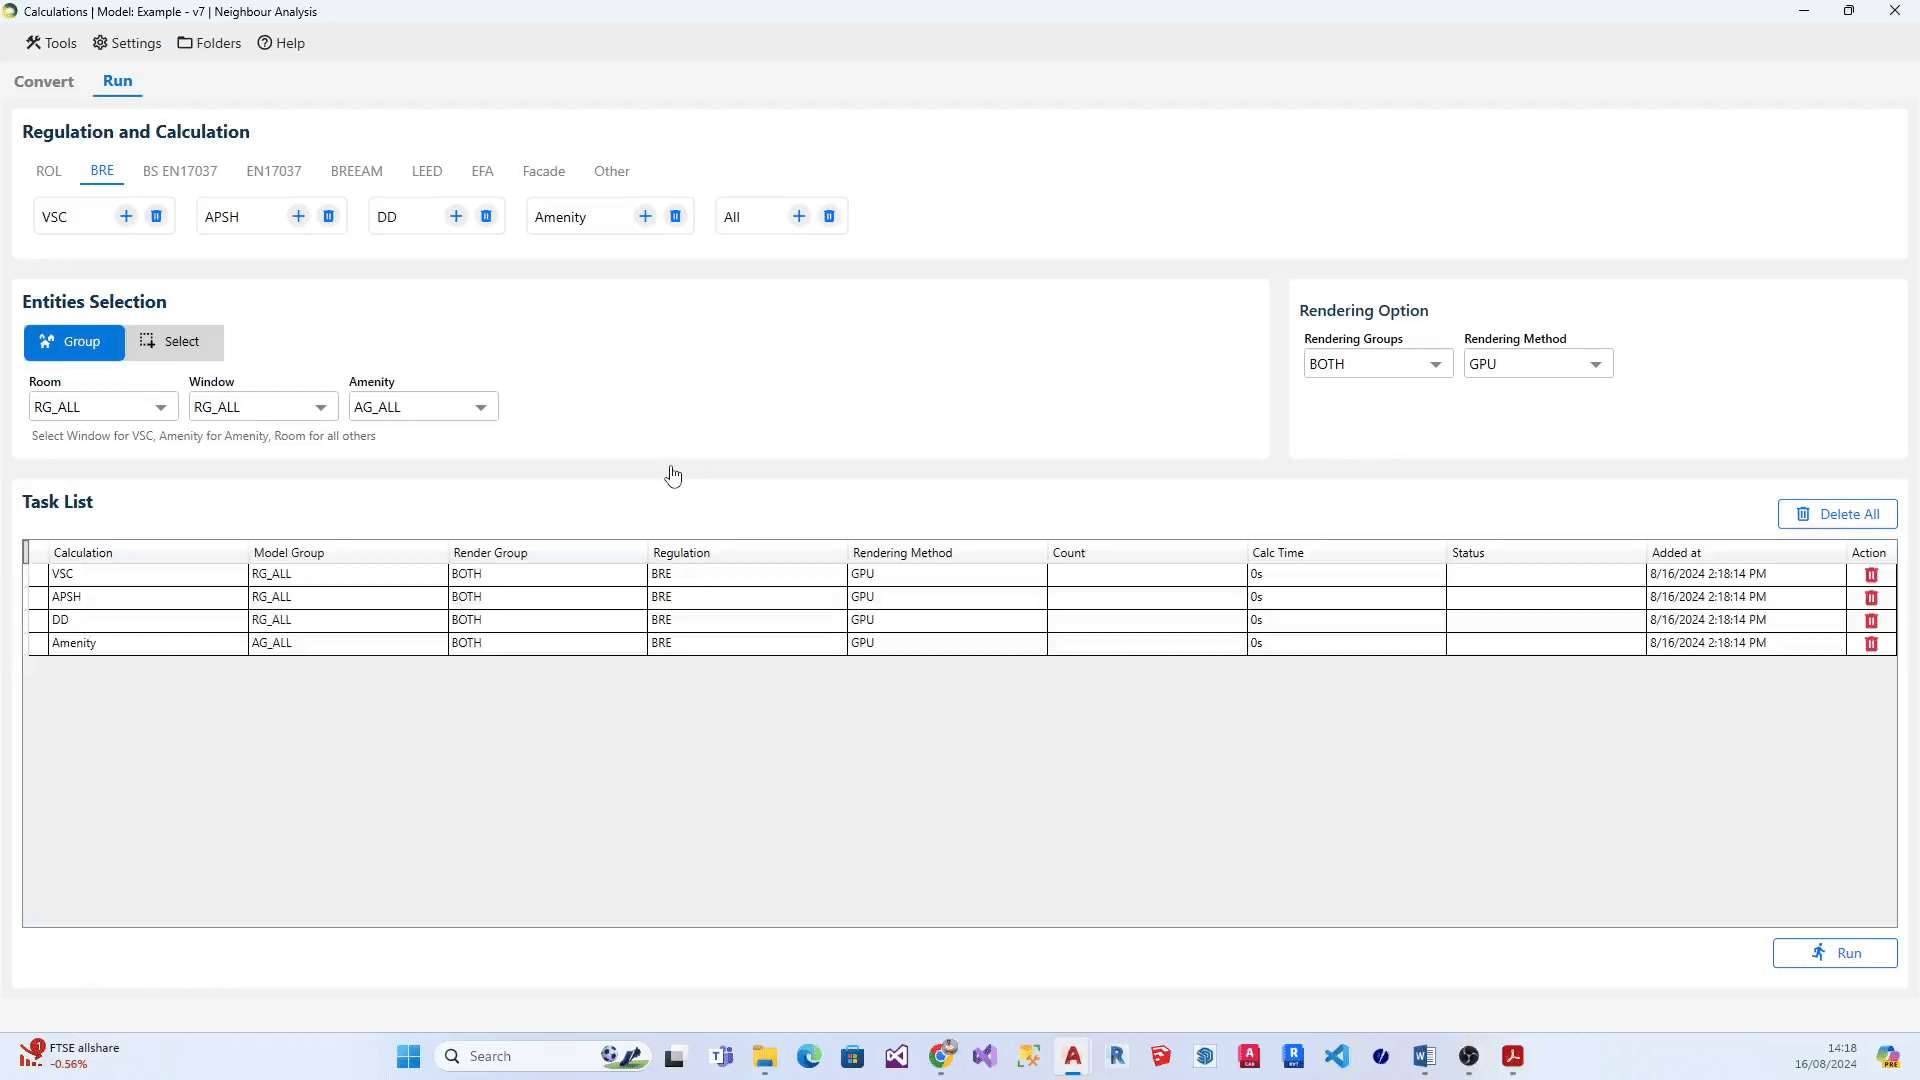
What are the steps to add multiple groups for a calculation to the list?
- Select the relevant regulation (eg: ROL, BRE, BS EN17037). The associated calculations get displayed below each regulation.
- On Enitities Selection section, Select All option from the relevant entity (i.e. Room, Window, Amenity, Facade). Note: All option will be displayed only if there is more than one group in that particular entity type.
- After selecting the All option, click on + icon next to the desired calculation. Alternatively, you can click + icon next to All calculations if you would like to add all the groups for the calculations in the regulation to the task list.
What are the steps to modify group for calculation on the list?
- Head to the relevant task on the task list and right-click on it.
- A little popout dialogue containing the list of relevant groups for the selected calculation will appear on your screen.
- Select the required group and click on Save.
What unit is used by the software?
- Metres.
- If the model is in millimetres, registration and conversion process would take forever and/or give errors.
- Model must be scaled to metres.
No Contour is created after running ROL/DD Calculation
- Use DrawRoomGridPoints to check calculation points position. They should be located in the WP height.
If not update the room (this is usually the case if the room is moved/rotated/reshaped without being updated). - Check if the window is facing inside, it must face outside. Use SpinWindows command to fix.
- Convert the model if windows have been updated but the model has not been converted again.
- View the model in Conceptual mode and check if any entities block the window.
- Use DrawRoomTriangles command to check the triangulation. If it gives error, then the problem may be the room is not registered properly.
Can PROPOSED group be created automatically when doing ROL cutbacks?
- Yes.
- Tick the Auto create PROPOSED group option in Asset tab.
- It will re create the group from objects in 3D_PROPOSED_BUILDINGS layer.
What transparency value should be used for Waldram image?
- Transparency: 0 = When overlapping, Proposed on top, Existing Hidden
- Transparency: 255 = When overlapping, Existing on top, Proposed Hidden
- Transparency :155 (or anything in middle) = Both visible
What does the colour of the dot indicate in APSH Waldram diagram?
- Dark Blue dot indicates winter sun
- Dark Yellow dot indicates summer sun
- light Blue dot indicates blocked winter sun
- light yellow dot indicates blocked summer sun
- Dot with hole indicate that the dot is seen by more than one window.
What does the colour of the dot indicate in SE Waldram diagram?
- Dark Yellow dot indicates sun dot visible from the window.
- Light yellow dot indicates sun dot blocked for the window.
- Red dot indicates that the dot is seen by more than one window in the room.
Do I need to Assign Material for registered Windows?
- No.
- Any registered windows will automatically get ThinGlass material (or glass in Radiance format).
- Therefore it is not required to create records for them in Material Table.
What happens to registered Windows Glazing Transmittance?
Any registered windows will automatically get ThinGlass material(or glass in Radiance format). Therefore it is not required to create records for them in Material Table. The material requires normal incidence transmittance for its definition which is derived from the ADF properties of the window at the registration time.
Td: Diffuse Transmittance (is used in BRE ADF formula)
Tn: Normal Incidence Transmittance
According to BRE Appendix C:
“diffuse transmittance can be found by multiplying the manufacturer’s normal incidence light transmittance by 0.91”
Tn = (Td ÷ 0.91)
And from BS8206 15.2:
“If daylight factors are calculated from the overall aperture area in the wall or roof, instead of the net glazed area, a further correction factor should be used. If there are any other obstructions, such as curtains or structural supports, the overall transmittance should be reduced in proportion to the area of opening that they obscure.”
T = Tn × GM × MF
T is the value used to derive parameters required for definition of glass material on any ray-tracing based Climate and Daylight Factor calculation.
GM: Frame Factor
MF: Maintenance Factor
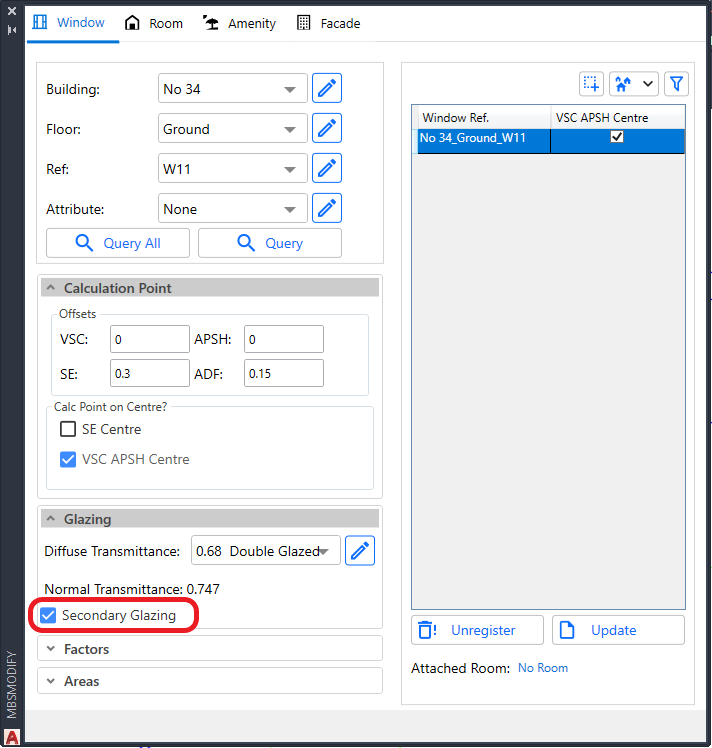
When to use Secondary Glazing option on Windows?
- This is an option which can be assigned to Windows during Registration or Update.
- This option is targeted for VSC and ADF calculations.
- Useful to analyse windows behind transparent balconies and winter garden.
- The windows in winter garden and transparent balcony can be registered as Secondary Glazing in order to reduce the inside window result by the relevant transparency of the outside window.
- For VSC and ADF calculations,
- If the outside windows are registered as normal windows, they will be treated as fully transparent by the inside window and thus not reducing the result by the relevant transparency.
- For ADF calculation,
- They don’t need to be/should not be attached to the Room when running ADF calculation.
- If they are attached to the room, they will be automatically ignored when calculating the room ADF to avoid overestimating the value.
- For ROL/DD calculations,
- The Secondary Glazing windows are ignored as if they are fully transparent.
- This is to avoid the need for them to be removed from the groups when running ROL/DD calculations.
- Because registered windows which are not attached to the room being calculated will be treated as opaque surface by ROL/DD calculations.
- It is also possible to calculate VSC for the Secondary Glazing Windows.
- The alternative is to assign ThinGlass material to the balcony surfaces using MBS material dialog.
- Refer to How to assign the Materials for Balconies? topic under Material Settings knowledge page.
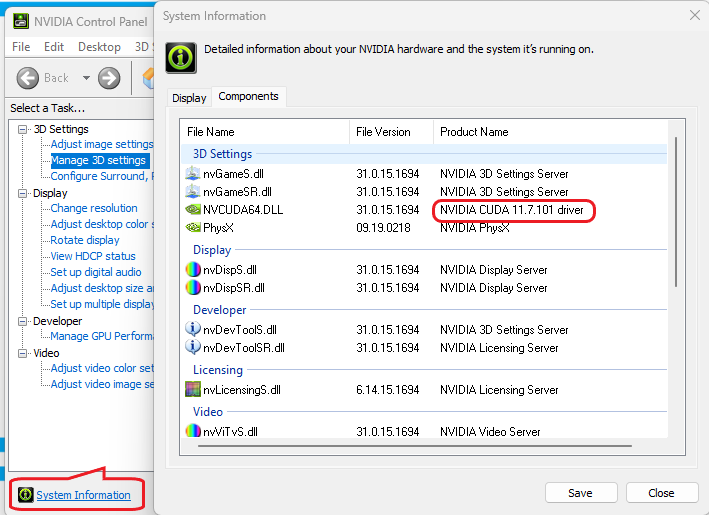
Which Graphics Card is required for GPU Calculation?
- The GPU calculation requires a compatible Nvidia graphics card.
- The Nvidia card must have compute capability of 3.5 or higher.
- This can be checked on this NVIDIA site
- https://developer.nvidia.com/cuda-gpus#compute
- Some older version supported cards are listed here https://developer.nvidia.com/cuda-legacy-gpus
- The Nvidia card must support CUDA driver version 11.1 or higher
- The computer must have CUDA driver version 11.1 or higher installed
- This can be checked by opening NVIDIA control panel (Right click on Desktop)
- Click on System Information and then Click on the Components Tab
- If the CUDA driver version is lower than 11.1, it can be upgraded by using the NVIDIA GeForce Application.
- If it is not installed on the computer, it can be downloaded from this NVIDIA site https://www.nvidia.com/en-gb/geforce/geforce-experience/
- Open Nvdia GeForce Experience
- Log in or Create Account
- Click on Drivers then Check for Updates